Spring Security (series) - Database user login #3
Brief
This post will be continuing the security-series and we will get right into it by logging in with a user defined in our database.
Implementation
We'll connect to the database in the same way we saw in this post and we'll define the UserRepository and the User entity to retrieve user data.
UserDetailsService
In the previous post of this series we found that the UserDetailsService is Spring Security's component responsible with finding the user.
This is why, to do authentication based on database-stored users we need to implement our own custom UserDetailsService. This service will hold a reference to the UserRepository.
@Service
@RequiredArgsConstructor
public class CustomUserDetailsService implements UserDetailsService {
    private final UserRepository userRepository;

    @Override
    public UserDetails loadUserByUsername(String username) throws UsernameNotFoundException {
        User user = userRepository.findByEmail(username).orElseThrow(() ->
                new UsernameNotFoundException("User not found by this email!"));
        return new CustomUserDetails(user);
    }
}Because we implement the UserDetailsService we need to follow the loadUserByUsername method signature. This is the reason why we need to create our own CustomUserDetails to be returned as a result.
public class CustomUserDetails implements UserDetails {
    private final User user;

    public CustomUserDetails(User user) {
        this.user = user;
    }

    @Override
    public Collection<? extends GrantedAuthority> getAuthorities() {
        return Collections.emptyList();  // only for demo purposes, should be taken from database at least
    }

    @Override
    public String getPassword() {
        return user.getPassword();
    }

    @Override
    public String getUsername() {
        return user.getEmail();
    }

    @Override
    public boolean isAccountNonExpired() {
        return true; // only for demo purposes, should be taken from database at least
    }

    @Override
    public boolean isAccountNonLocked() {
        return true; // only for demo purposes, should be taken from database at least
    }

    @Override
    public boolean isCredentialsNonExpired() {
        return true; // only for demo purposes, should be taken from database at least
    }

    @Override
    public boolean isEnabled() {
        return true; // only for demo purposes, should be taken from database at least
    }
}AuthenticationProvider
Next, the AuthenticationProvider is the component responsible with the actual authentication logic. Holding references to UserDetailsService and PasswordEncoder ( in our case CustomUserDetailsService and NoOpPasswordEncoder) we will create a CustomAuthenticationProvider.
@Component
@RequiredArgsConstructor
public class CustomAuthenticationProvider implements AuthenticationProvider {
    private final CustomUserDetailsService userDetailsService;
    private final PasswordEncoder passwordEncoder = NoOpPasswordEncoder.getInstance();

    @Override
    public Authentication authenticate(Authentication authentication) throws AuthenticationException {
        String email = authentication.getName();
        String password = String.valueOf(authentication.getCredentials());

        UserDetails userDetails = userDetailsService.loadUserByUsername(email);

        if (passwordEncoder.matches(password, userDetails.getPassword())) {
            return new CustomAuthentication(email, password);
        }

        throw new BadCredentialsException("Authentication failed!");
    }

    @Override
    public boolean supports(Class<?> authentication) {
        return UsernamePasswordAuthenticationToken.class.equals(authentication);
    }
}Same as with the UserDetailsService, implementing the AuthenticationProvider interface forces us to follow a certain method signature for the authenticate method. It receives as an input and also returns as a result an Authentication object. For this example I chose the UsernamePasswordAuthenticationToken since we have a basic authorization based on user and password.
public class CustomAuthentication extends UsernamePasswordAuthenticationToken {

    public CustomAuthentication(Object principal, Object credentials, Collection<? extends GrantedAuthority> authorities) {
        super(principal, credentials, Collections.emptyList()); // chose this constructor because it also sets the `authenticated` property to true.
    }
}AuthenticationManager
The final thing we need to do is adding our CustomAuthenticationProvider to the Spring Security's AuthenticationManager.
@Configuration
@RequiredArgsConstructor
public class SecurityConfig extends WebSecurityConfigurerAdapter {
    private final CustomAuthenticationProvider customAuthenticationProvider;

    @Override
    protected void configure(AuthenticationManagerBuilder auth) {
        auth.authenticationProvider(customAuthenticationProvider);
    }

}Test
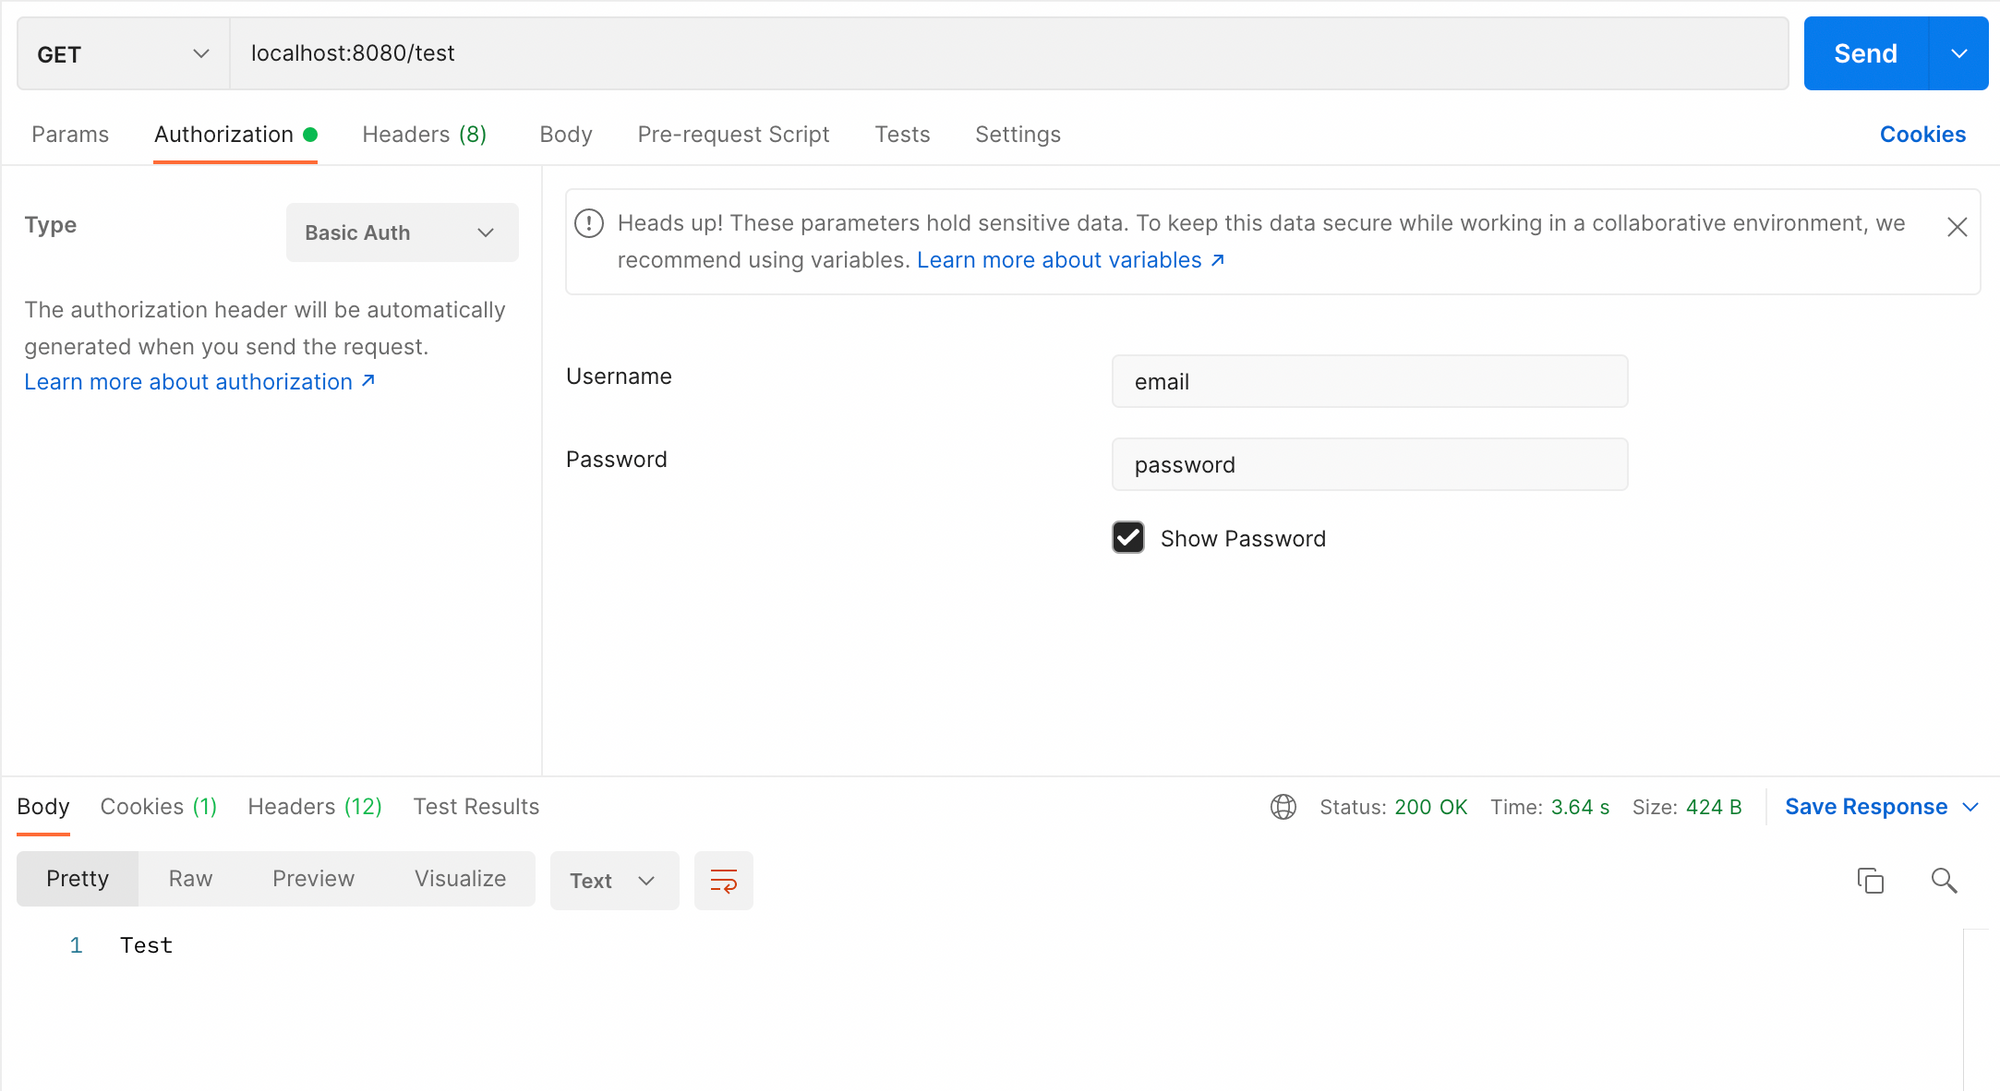
Bringing everything together, we'll test it sending a Postman request. You need to add a Basic Authorization on the request, having the username and password containing valid credentials from the database.
This post is the last one of the Authentication side of Spring Security. In the next posts we'll focus on Authorization. We'll define roles for our users and let them access endpoints in our application based on them.
Like always, checkout the full code here: https://github.com/andreiszu/spring-security
Stay tuned! 🚀